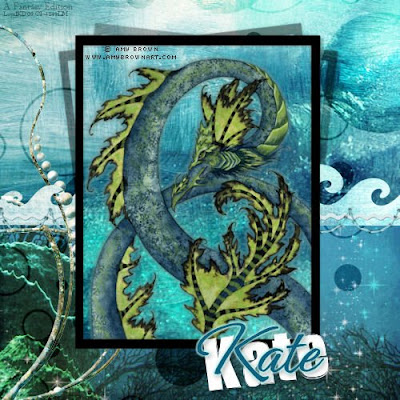
Tutorials from me are very rare - so don't expect a lot LOL
Kit used: Mermaid Dreams in the Ocean by Urban Mermaid Designs
She does have a tagger size kit available as well! I work with Full Size kits most times.
This IS a PTU kit and I LOVE it - actually I love most of her work. I haven't used
all of her kits but I'm working my way there lol.
Thanks for another great kit Kate!
I used a tube by Amy Brown - you can get a license and her tubes at CILM.
I used a tube from Pack S - it's her latest release.
Plugins: Eyecandy 4000 & Maurs Copies
Okay, shall we get started? [ The text is all up to you tho! ]
1. Open paper of your choice - I used Paper 2 - resize to 500x500 pixels.
Open your tube and resize by 70% or as needed.
Copy tube to your tag.
2. Rectangle Tool - Foreground ONLY - color of your choice - size 4
Draw a simple rectangle around your tube & convert to raster layer
Duplicate your rectangle layer & resize by 105%, merge down.
3. Add a new layer. Click on your rectangle layer to activate it.
Magic wand - select INSIDE the rectangle - selections - Expand by 3 -
select your NEW layer and flood fill. Drag layer below your rectangle layer - merge down.
4. Convert your background to layer.
Magic wand - select INSIDE the rectangle - selections, expand by 3
Activate your background layer - promote selection to layer.
[ Do NOT merge yet ]
5. Eyecandy 4000 - add a VERY LIGHT GG to the tube - VERY LIGHT.
Add a drop shadow to the tube - not to heavy.
Your layers should look like this:
Frame
Tube
Promoted Selection
Background
6. X out the background & merge visible
Duplicate the merged layer - apply plugin Maurs copies
After Image - Rotate Random - I set the top to 4 & left the rest alone
Lower opacity to around 60%
7. Open element 12 & resize to width of 500 - apply to your tag
Your layer should look like this:
Top Image
Element 12
Copied Image with plugin effect
Background
8. Open a second paper - I used paper 1 - Resize to 500x500
Place the paper UNDER element 12 & erase the paper ABOVE the waves
9. Open element 3 & resize by 30% & paste to your tag, moving it to the left
Paste on your tag ABOVE the waves
Selection tool - FREE HAND LASSO
Upscale your image so you can see - then lasso around two parts of the
waves - you do NOT have to get the outline perfect =]
10. Once you have what you want, make sure the waves layer is active
& go to selections, float - defloat. Activate your element 3 layer & hit delete.
Pretty cool huh? I love that.
11. Open brush3 & resize by 70%
Paste to your image & change the blend mode to soft light
Move the paper to just above the second paper.
Layers:
Main Image
Element 3
Waves
Brush 3
Second paper
Duplicated image with plugin
Background
12. Merge visible - add your info & artist info - save as .jpg and you're all done!
Hope you enjoyed & it wasn't to hard to follow!
- Danielle S. -
The Urban Fairy


0 comments:
Post a Comment